

How to Create a Copy Trade Provider on Traia
In this tutorial, we explain how to create a Copy Trade Provider account on the Traia platform step by step.
Many professional traders are looking for ways to generate consistent income beyond their own personal trading. One of the most effective solutions is offering a trading service through social trading platforms. Traia allows traders to register their accounts as providers, enabling other users to follow and automatically replicate their trades.
In this educational guide, you’ll learn exactly how to set up a provider account on Traia by following the same path and buttons available inside the user dashboard.
Step 1: Access the Dashboardand Start the Process
Navigating to the Add Account section
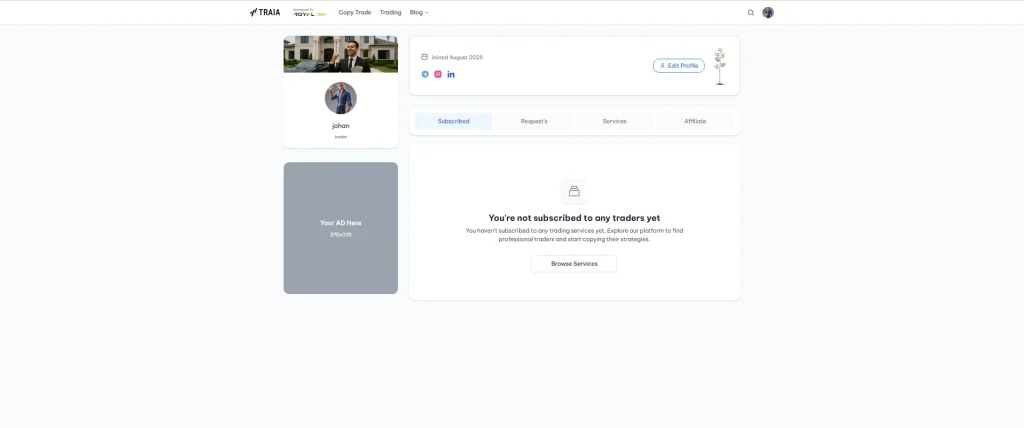
- Log in to your Traia user account
- After logging in, you will be redirected to the Dashboard
- From the left‑hand menu, click on Services
- On the Services page, click the Add Account button
After clicking Add Account, a new window for creating a service will appear.
At this stage, no technical or financial information is required. This step simply initiates the service creation process.
Step 2: Select the Provider Account Type

Defining your trading role
This guide explains how to create a copy trade provider on Traia step by step.
- In the Add New Account window
- Choose the option Copy Trade Provider
- Click Continue or Next to proceed
By selecting this option:
- Your account is registered as a strategy provider
- Other users will be able to follow your trades
- The monetization path for your trading activity is enabled
After confirming, you will be redirected to the service configuration page.
Step 3: Enter Service Basics
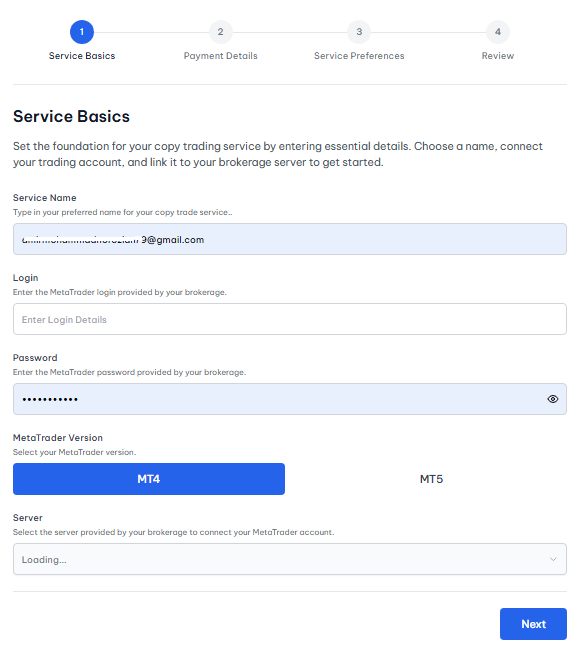
Connecting your MetaTrader account to Traia
On the Service Basics page, you need to complete the core account details carefully:
-
Service Name
The name that will be displayed publicly to users
-
Login
Your MetaTrader account number
-
Password
Account password used only for connection (no withdrawal access)
-
MT Version
-
Server
Choose the correct broker server associated with your trading account
After filling in all required fields:
- Click Next
This step establishes the technical foundation of your trading service.
Step 4: Define the Revenue Model (Payment Details)
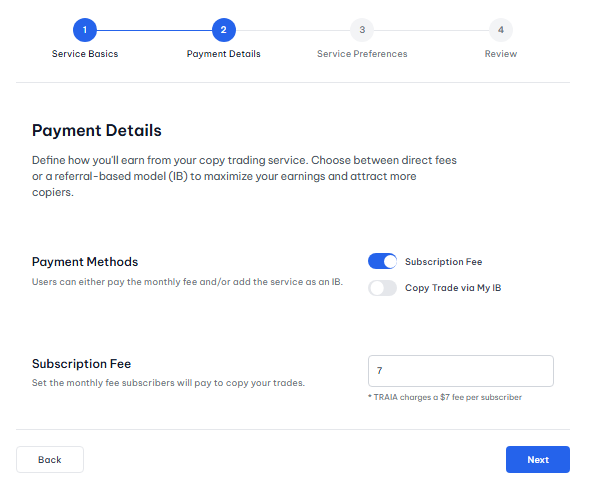
Configuring service monetization
On the Payment Details page, you choose how the service generates income:
- Select Subscription Fee or Copy Trade via My IB
- Enter your desired amount (for example: $7)
With the subscription model:
- Users pay a monthly fee to access your trades
- The pricing is fully controlled by the provider
Once the amount is set:
- Click Next to continue
Step 5: Service Preferences Configuration
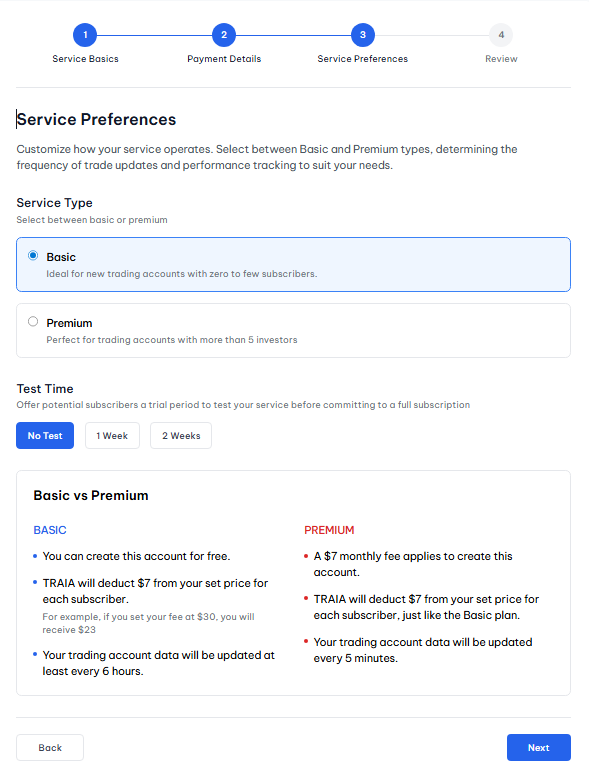
Choosing the service type
On the Service Preferences page, define how your service operates.
Available options:
Basic Service
- No service creation fee
- Trade updates every 6 hours
- Suitable for newly launched accounts
Premium Service
- Monthly service fee applies
- Trade updates every 5 minutes
- Designed for professional providers
Setting the trial period (Test Time)
You can allow users to evaluate your service before subscribing:
- No Test
- 1 Week
- 2 Weeks
This option helps potential subscribers assess performance and reliability.
After completing the settings:
- Click Next
Step 6: Review and Confirm the Service
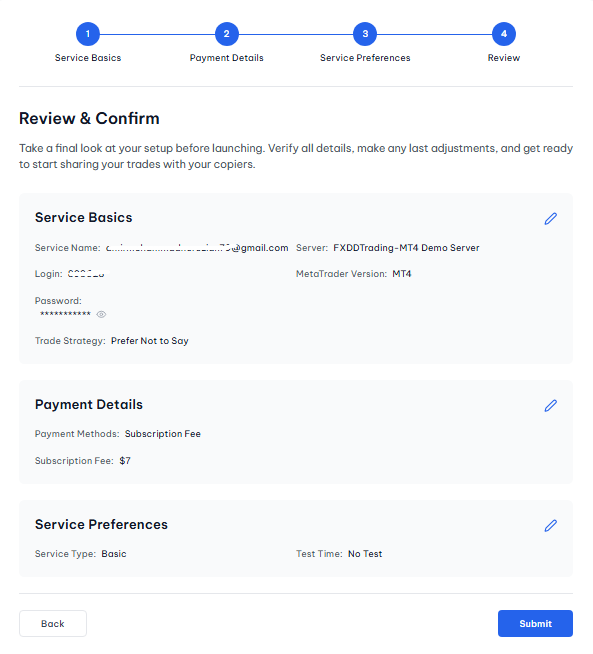
Final verification
On the Review & Confirm page, a full summary of your service is displayed, including:
-
Service Basics
- Service Name
- MT Login
- MT Version
- Server
-
Payment Details
- Subscription Fee
- Amount
-
Service Preferences
- Service Type (Basic or Premium)
- Test Time
At this stage:
- Use Edit if any information needs correction
- Click Submit if everything is accurate
After submitting:
- Your service is registered
- The provider account becomes active
- The service appears in your Services list
Learn more about copy trading features on Traia here: https://traia.app/copy-trade


